How to work with the App Store Manager
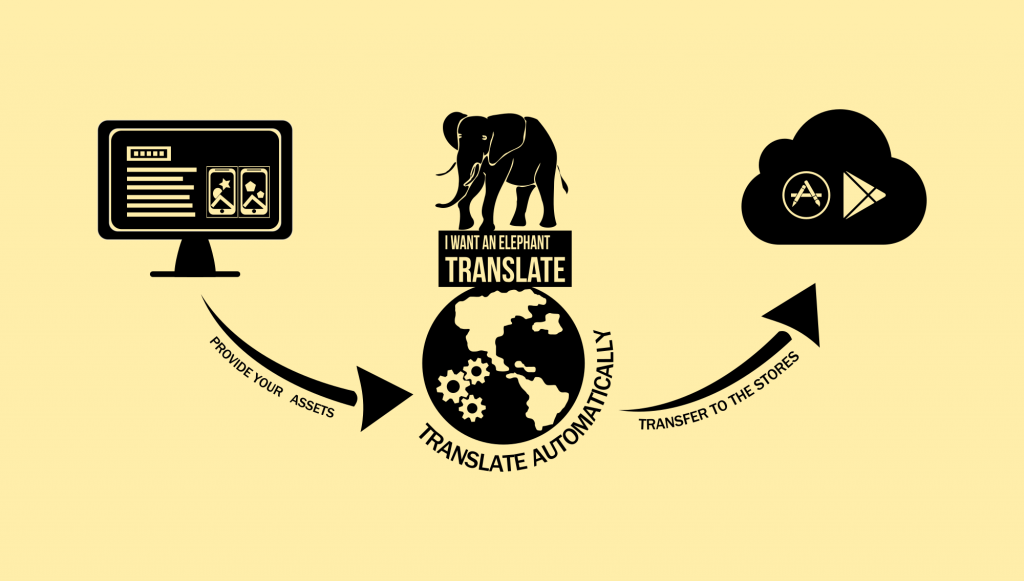
The App Store Manager allows to manage, translate, edit, and transfer app descriptions (metadata, screenshots (planned)) to Google Play Console and App Store Connect.
It offers many different functions to save ASO managers, app publishers, and app developers as many repetitive and cumbersome steps as possible. Maintaining both the Google Play Console and App Store Connect eats up a lot of time. Use this time more wisely and better.
For the best possible marketing of an app, however, frequent updating and adjustment of the store entries are necessary. The App Store Manager helps with this. Through various automation and easy to access and understand functions.
The following instructions will help you with the setup, the transfer, and the first transfer of titles and descriptions.
Important:
- You require a developer account for App Store Connect and/or Google Play Console
- The app exists already within the respective store (draft or published)
Set up an app
After logging in to the App Store Manager, the dashboard shows surveys on new product features, news, and quick access to various areas of the application.

The first step consists of creating the first app. In our example, we already have a few apps configured.
In the context of the App Store Manager apps represent either an Android or iOS app and consist of at least one or more app descriptions. They are the counterpart to the respective app configurations in App Store Connect or the Google Play Console.
Select “New App” in the app overview for this. This is quickly accessible via the “mobile” icon in the navigation.

The app configuration includes a few information to allow store access.
- The platform: is it an Android or iOS app?
- A name: this is arbitrary, use the real app name to keep the overview
- The package name (Android) or the bundle ID (iOS). These are the technical identifiers of the respective app.
These must necessarily be the same as in the code of the actual app and stored in the respective stores.
If you are not sure what the package name or bundle ID is, you can look it up in the Google Play Console or Apple App Store.
Log in to the Google Play Console. The package name is directly under the app name in the Dashboard overview. In this example: de.losandros.skyPacer

Log in to App Store Connect. The bundle ID is under “App Information”. In this example: de.losandros.skyPacer

Enter the information accordingly. However, access without valid information is not possible.

Add an existing app
Apps that are already accessible via the stores can also be created very easily and quickly via the search. This requires the title, or parts of the title, as well as the specification of the platform and the language.
- Title: the name of the published app
- Platform: Android or iOS
- Locale: in which store language was your app published and can be found?
Press enter or click on “Search” to proceed and find your app.

The App Store Manager lists the search result and displays the title, author, app icon, and package name/bundle ID. Select the applicable, already published app and click on “Finish”
If the desired result is not there.
Try the following:
- Write out the title in full.
- Did you spell the title correctly?
- Are you searching for an already published app? The search retrieves only published apps.
- have you selected the right platform?
If further attempts fail, use the manual creation of the app described above.

After you have selected an existing or added an app manually, the App Store Manager creates the app for you within the application.
Additionally, there is the possibility to create an app description directly. In this tutorial, however, we decide against this and select “No”.

App overview
The app overview shows the new app. On the left the Android apps, on the right the iOS apps. Click on the app entry to open it.
Behind the orange dots you will find the following additional functions:
- Open – Opens the app
- Edit – Allows changing the app configuration
- Delete – Deletes the app permanently

Creation of an app description package
- An app description package represents a set of assets.
- Consisting of title, long descriptions, screenshots, etc. for all configured languages of an app.
- Apps can have multiple app description packages.
This allows packages for different occasions or events to be created, retained, and reused. For example, in addition to a package for normal operation, one can also be created for Christmas, Halloween, or a summer special.
The App Store Manager manages these packages and enables the transfer of individual packages to the respective store.
The assets of an app description package are:
- App descriptions: title, short description, long description for Android. Name, subtitle, keywords, description, promotional text for iOS apps
- Screenshots (planned): the minimum required screenshots for an app
- Icons (planned): the icon set for the app
- Marketing and privacy URLs (planned)
All assets can be localized (translated automatically or manually) and be translated and transferred to the stores.
To create an app description package, navigate to the respective app. Open the app and click on “New Package”.

The application creates a default name for the package. Change it to a rememberable name. For example, a short description of the content. Click on “Save” after you have adjusted the name. The package settings view allows to delete the package as well (can not be undone) and provides an overview of the translated characters if you have used the translation feature. On the left side, you find the other package assets, the transfer function, and the package logs.

Create an app description
Navigate to the “App descriptions” menu item. There, the text information of the app is maintained in all languages.
Generally, the languages do not have to be created in the stores. If they have already been created, they can be omitted or overwritten during the transfer.
Important: for Google Play, when creating a new language, all information must be transferred. I.e. title, short description, and description are then mandatory fields.
The view generally shows whether a field has already been filled or not. Filled fields are displayed in bold.
Using the list on the left side, it is possible to switch between the individual languages.
The filter above allows quick access to languages that are filled, have incorrect values, or are empty.
Basically, the information can be entered here manually or copied and pasted from other sources. In addition, data can be added via file import, an import from the associated store, if the app already exists there.
In addition, translation into other languages is possible here.

Import descriptions from an existing app
Provided that the app already exists in one of the two stores, its existing description can be imported. The retrieval is started via “Import” with the corresponding icon of the respective store (App Store or Google Play). For the retrieval, the app must be configured correctly and the access data must be provided. How to configure the access is described for Android here and for iOS here.

Once everything is entered correctly and “Import” is clicked, the process starts. This is an asynchronous process. That is, the retrieval may take time depending on the server traffic. A loading spinner shows how long the process is running.

Once the process is complete, the view is available again. It displays all the languages and their contents that are configured in the store, and that have been retrieved.
It is possible to view this data and by means of selection (checkmark) to choose those that should be added to the new descriptions.

After “Add to descriptions” has been clicked, the view changes again from the import mode to the regular view, where the descriptions can be customized per language.

App description file import
Another import option is file import. In this, you will also find a file template with the required (JSON) format. Import translations created by e.g. external partners in this format.
The successful import is also displayed again in an intermediate step and the desired content and languages can be taken over.

Translate app descriptions
An essential function of the App Store Manager is automatic translation. Select the “Translate” button under “App Descriptions”.
In the “Source Language” drop-down list, select the source language. This is the language from which you want to translate into the other languages.
Note: to proceed, maintain at least one language in the parent view (“App Descriptions”).
Next, select the languages you want to translate into and click “Translate”.

The translation also happens asynchronous. That is, a loading spinner indicates the process duration.
As soon as the result is there, it will be displayed again. Select the desired content and include it in the new descriptions.

Upload descriptions to the stores
Transfer all the desired imported, translated, edited, and validated descriptions to the corresponding store.
To do this, switch to the “Upload to…” tab.
The summary displays the prepared languages.
You can use the selection box to decide which language should be transferred.
An exclamation “!” mark indicates incorrect languages. Resolve such errors to proceed. The App Store Manager will only accept valid languages for an upload.
To do this, return to the “App descriptions” and use the “!” filter to simply select the incorrect languages and correct them. Most of the time, the translation just exceeds some field lengths.
Important: With performing an upload you overwrite the selected languages in the respective store. A restore is not possible. Therefore, create a backup beforehand.

Select the right release track (Android only) like production, internal, alpha, or beta. If an app is not yet in production, prepare the store in advance by selecting a test track.

Start the upload
Next, you can upload the selected languages.
Observe the following instructions:
- Consider the guidelines and policies of Apple and Google in any case
- With the upload, you overwrite your app description metadata accordingly
- Empty fields, do not overwrite values in the stores
- Apple transfers are only live as soon as the release has been manually requested in App Store Connect
- Google changes, can go live directly after the review by Google and depending on the setting

Once the loading spinner has disappeared, you can check the finished result either in the relevant store or in the log area of the App Store Manager.
The notifications (top right) also provide information about the successful transfer.
If an error occurred, check the message and adjust the configuration accordingly. See the FAQ for further assistance. If this does not help, please contact the support.
Conclusion
App Store Manager helps to translate and deploy app descriptions in a simple way. Eliminate the repetitive, time-consuming tasks imposed by the stores and save time that you can use for more meaningful activities. In addition, the use of optional automated translations helps you test new markets before importing and transferring professional translations to the stores with App Store Manager.


