How to configure API access to Google Play Console
Log in to the Google Play Console normally requires your Google Account or your login credentials. But if you like to grant access to certain third-party applications, another way is required to provide the requested data. A third-party application which allows data analysis or automation like the App Store Manager, access the Google Play Console through various APIs. But without providing access rights and access permission, no connection is allowed.
The following article describes the required steps to configure API access by creating a new service account to a selected app for a third-party application. Basically, two main steps (with some actions) have to be performed.
- Create a new service account with int the Google Cloud Console
- Set permission within the Google Play Console
Follow these step-by-step instructions, because sometimes you can get lost in these user interfaces.
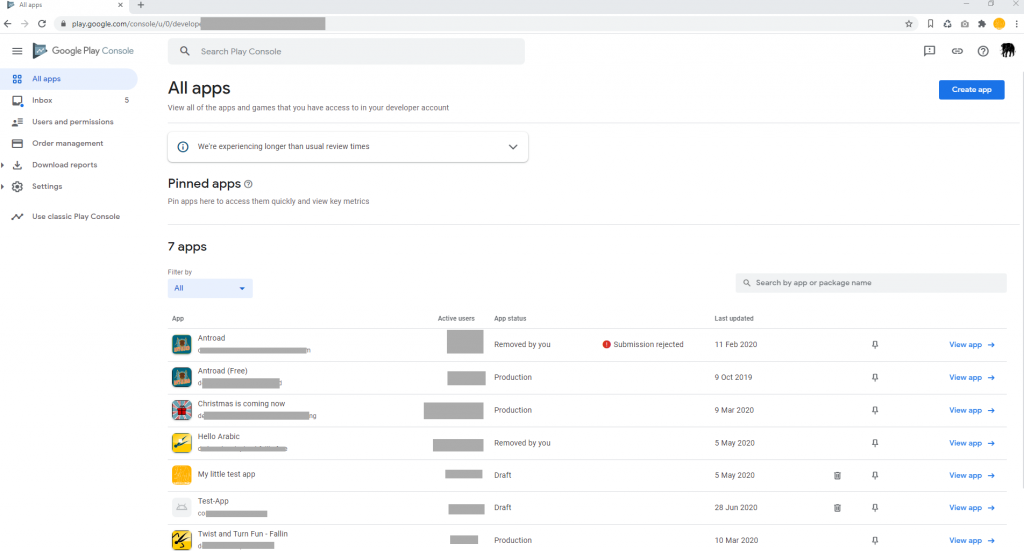
The Google Play Console
Google redesigned its Play Console only a few weeks ago. It is still not easy to navigate and to find every required information. For instance, Release Management is a kind of its own science. On the first screen, you likely will see your available apps. You can pin the more important ones to the top. We like to provide API access to one of our demo-apps.
Developer Account/ API access
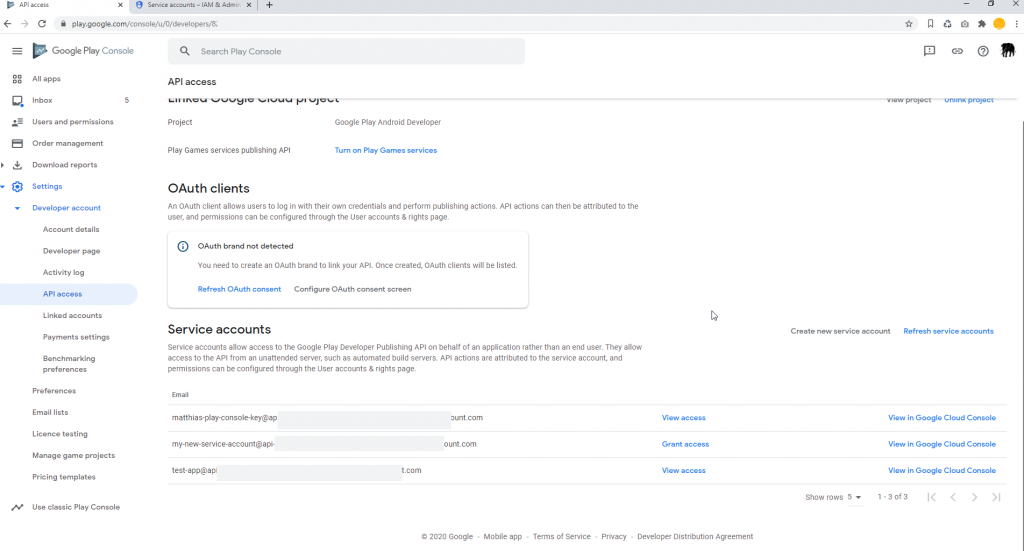
On the left navigation bar, navigate to “Settings/ Developer account/ API access”. On this screen, you’ll find – if you already have done so – your configured service accounts.
Here you can adjust the permission on service account has on a global level (all apps) or per app.
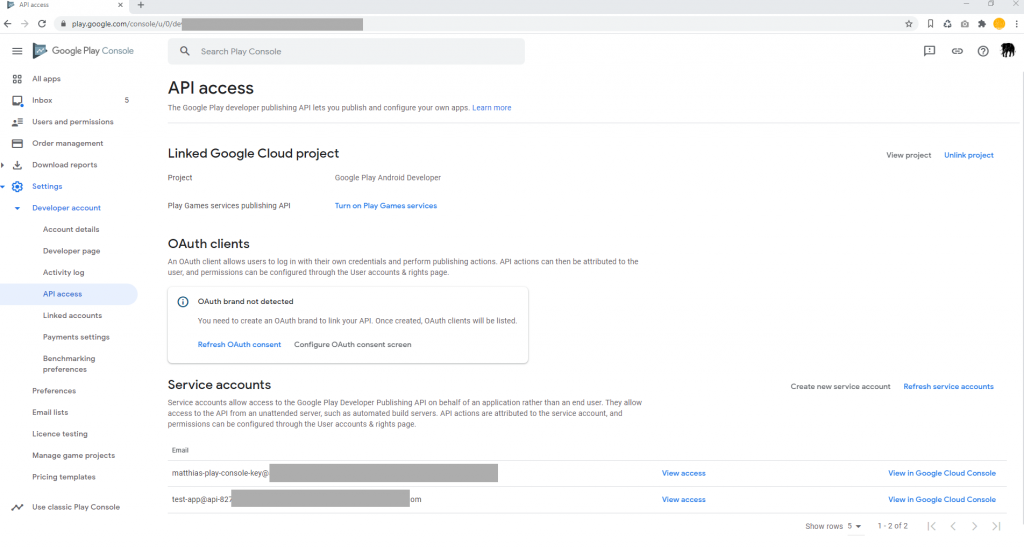
Create new service account
Select “Create new service account”. A pop-up will show with a short description. New service accounts will be created within the Google Cloud Platform. There, we will create our JSON or P12 file as well, which is the key to our third-party apps. Therefore click on the blue “Google Cloud Platform” link.

Google Cloud Platform
The Google Cloud Platform is the one place, where you can configure various Google cloud services, their APIs and their access rights.
Google Cloud Platform, offered by Google, is a suite of cloud computing services that runs on the same infrastructure that Google uses internally for its end-user products, such as Google Search, Gmail, file storage, and YouTube.
See https://en.wikipedia.org/wiki/Google_Cloud_Platform
Navigate to “IAM & Admin” and there to “Service Accounts”, if this view is not already open. The title should show “Service accounts for project Google Play Android Developer”.
Here you’ll see other service accounts if you already have some in place. If you have lost your key file ( you shouldn’t) you can create a new one here.
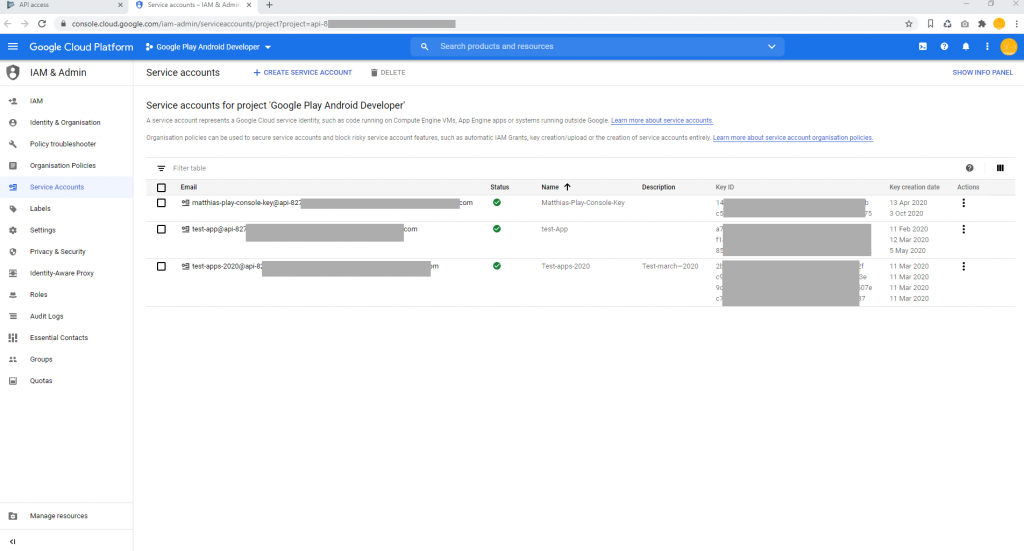
Create service account
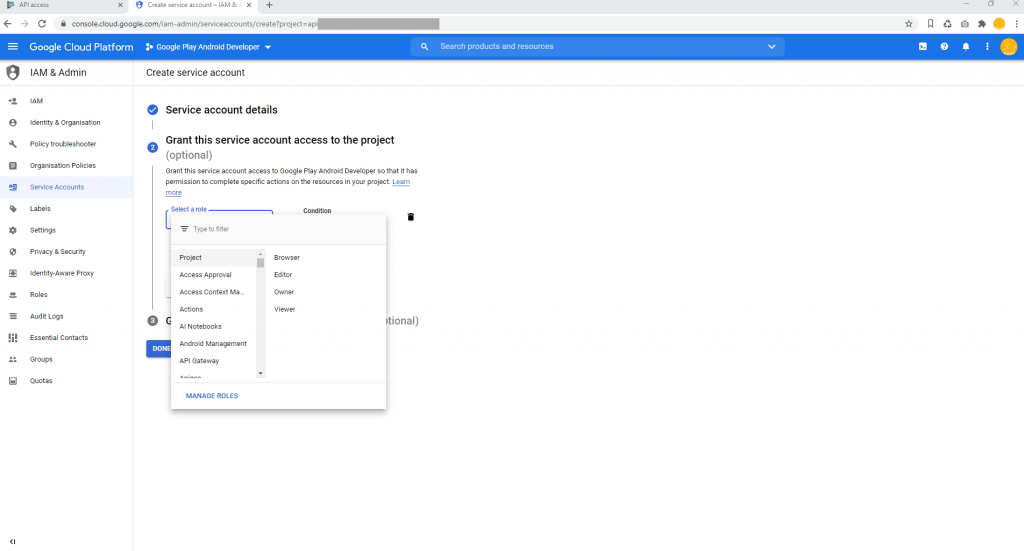
Select “Create new service account” on the top. A form will guide you through the next steps. Provide a service account name. Add something which could be remembered. For instance the name for the service you are providing access for. Leave the ID as is and give a good remarkable description.

Set role
In the second step, choose a role. The role determines a certain access right. We will change it later, to the required ones. Choose “Project/ Editor” or something with fewer access rights. Click on done and you have successfully created a new service account.
Create key
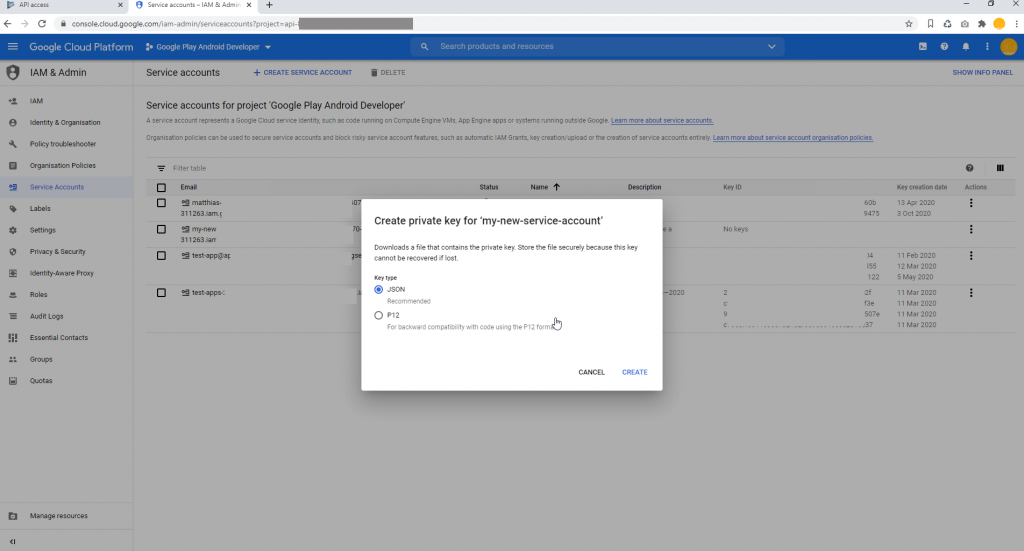
Your new account shows up in the list as your first service account or between already existing ones. Validate the name and the description. On the far right, you see the thee three action dots. Click on them and select “Create key”.

Key type
A modal shows up and provides two options, two key types. The JSON format or the P12 format. At this stage, you should know which key is required for your third-party application access.
JSON (JavaScript Object Notation) is a lightweight data-interchange format. It will contain some encrypted strings, among other information.
The P12 format is a binary archive file format for storing many cryptography objects as a single file.
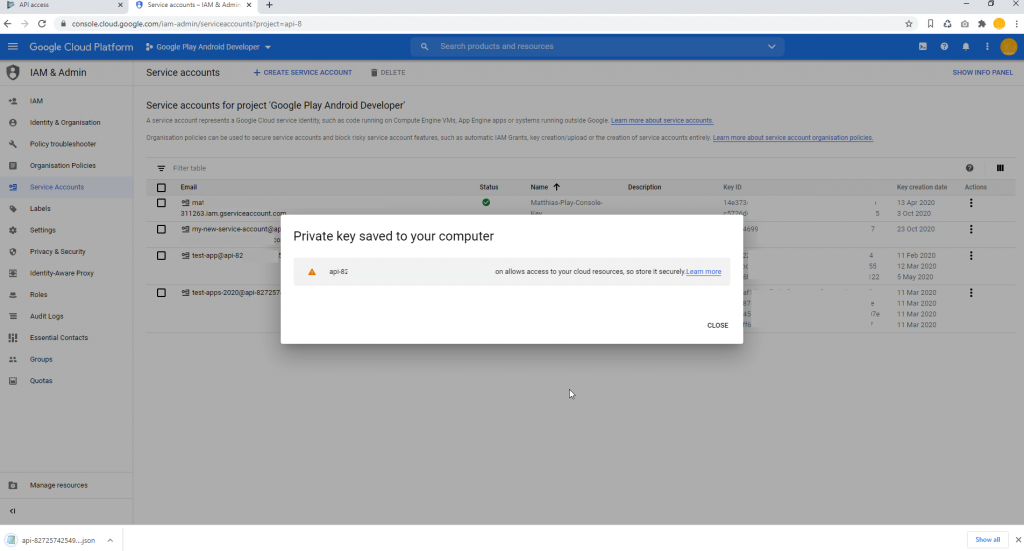
Download key
In our example, we create a JSON key file and download it to our hard drive. Take the file and store it somewhere safe. We will require this file within our third-party application.
When you are done, close this tab or window and navigate back to the Google Play Console.
Service account overview
Click on “done” and you find the previously created service account within the service accounts list. If required press “F5” for a browser refresh or reload the page in a different way.
Choose “Grant access” in the middle of the line which belongs to the created service account. Now it is time to configure API access or respectively permissions on individual apps.
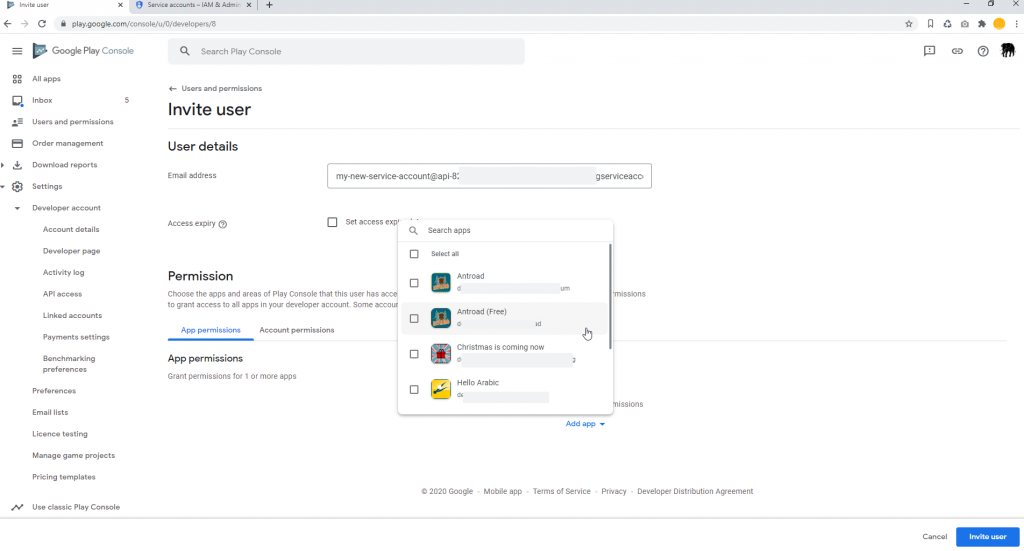
App permissions
Navigate to the first tab “App permissions”. Here you choose one or more apps for which the service accounts get access. Select only the required ones. Press “Apply”. A modal will show up and allow you to modify some permissions but not all of them. This is because we have to modify the global service account permission first. Close the modal and navigate to “Account permissions”.
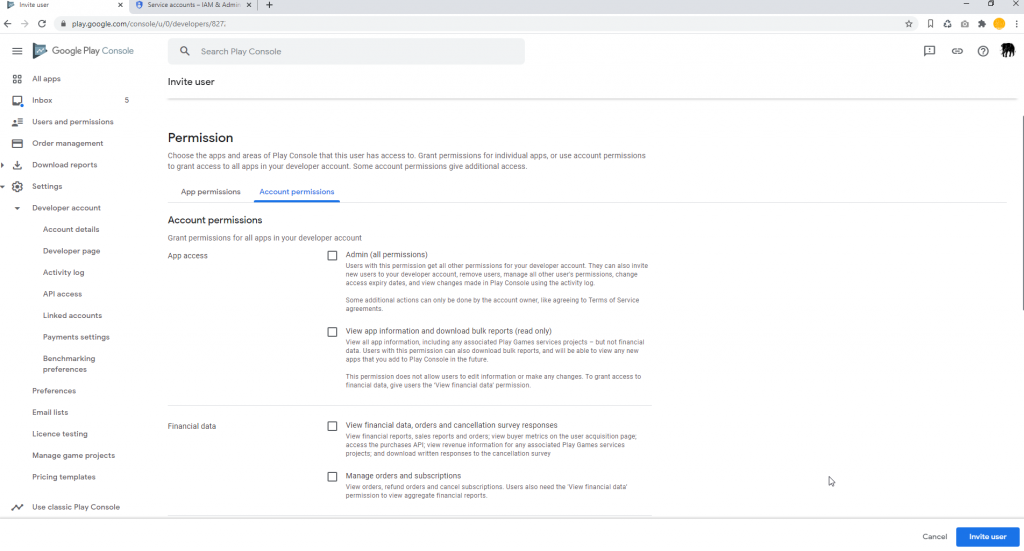
Remove permissions
It is a good idea to remove all global permissions and to set the service account access rights for each app individually. This way no unwanted authorizations creep in.
Remove all checkboxes and switch back to the “App permissions” tab.
Set access permissions
Once again select the app for which you want to assign rights. In our example, we only select “Manage store presence”. The “View app information” is selected by default. Press “Apply” to accept the settings.

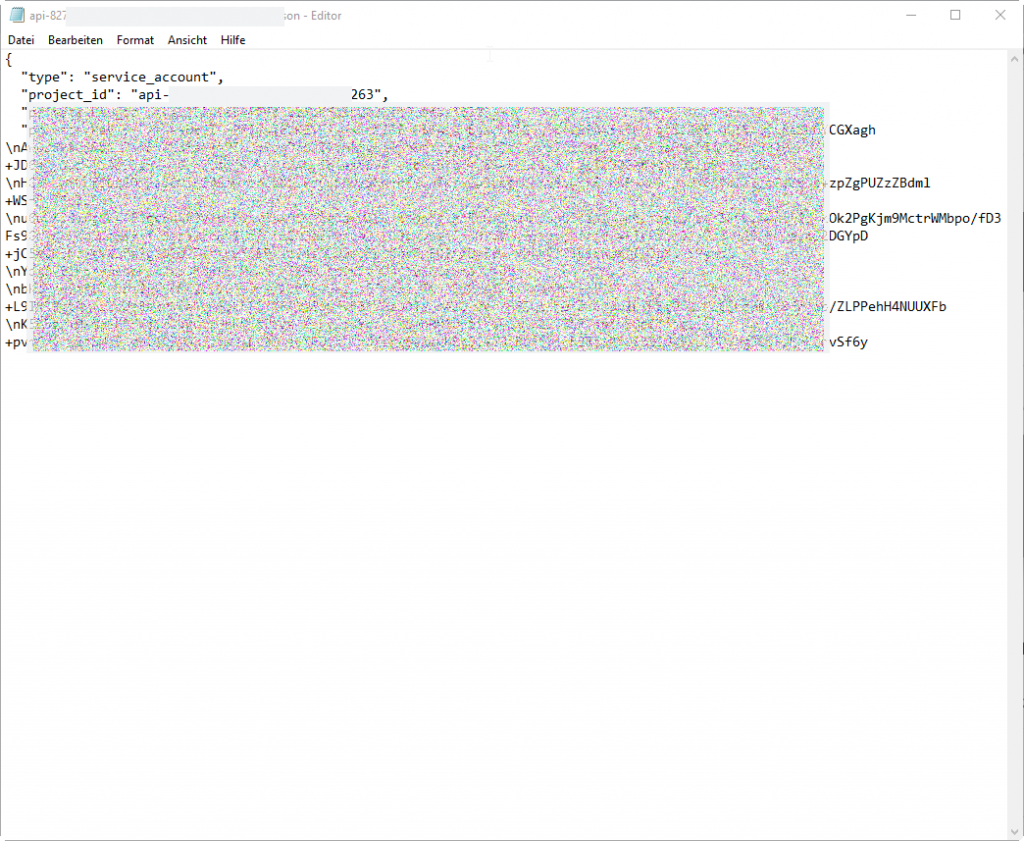
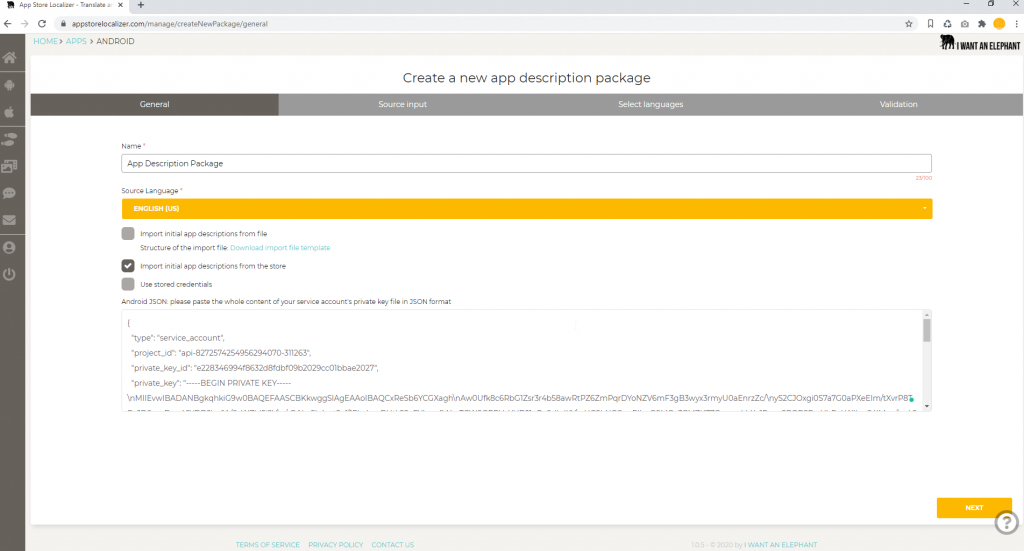
Provide the result
Use the created key file (JSON or P12) within your desired application. Sometimes you have to upload the whole file, in the case of our example, the App Store Manager, you provide only the content of the JSON file. Therefore open the file within your preferred editor (Notepad++, UltraEdit, or your standard OS editor) and copy the whole content with all brackets. By adding the JSON string we have successfully configure API access for the App Store Manager.
Configure API access to Google Play – conclusion
A few important notes on the storage and management of the service accounts and key files:
- Don’t provide more access rights than required
- Delete unneeded service accounts
- Don’t forget to remove access to applications you don’t require any more
- If you have “lost” a key file, remove the service account, and configure a new one
We have established third-party access to the Google Play Console and configured the required access rights. The mechanism itself is actually not complicated once you have done it a couple of times.
And for those who rarely have to do it and like to forget it, they can always look it up again here 😉

